
The theme this month for What's Baking, hosted by Stephanie of Brownies & Blondies, was Make a Convenience Item From Scratch (and use it in a baked good if it's not a baked item). I tossed around the idea of making my own pie crust and then a delicious pie, or a yummy batch of donuts, but I've had English Muffins on my to-make list for quite some time, and what better reason to make them than for What's Baking??
I had my doubts during the process, and it definitely wasn't the tradional bake-in-the-oven type of bread product, but the end result was better than I could have hoped for. I ran out of regular all-purpose flour (what?!?!) so I had to modify the recipe to incorporate whole wheat flour as well - and fortunately it worked out very well. And, since I usually buy the whole wheat variety at the grocery store, it was fitting for me to be making this as a convenience item.
What I really can't wait for though, is to have these for breakfast all week. I see some slathered with peanut butter, topped with Granny Smith apples, and some with breakfast sausage and cheese. And maybe, just maybe, I'll wrap up a few to take to work and share.
And of course, I have to share the recipe with you! This is probably one of the easiest things to make at home - while the dough is rising you can get other things around the house done, and then you just "bake" them up on the stove! And when you break these babies open, toast them up, and put your favorite toppings on...you'll wonder why you have been buying these at the store all this time. I don't think I'll ever buy them again!!

Whole Wheat English Muffins
Slightly adapted from Confections of a Foodie Bride, via King Arthur Flour
Ingredients
- 1 3/4 cups milk, lukewarm
- 2 1/4 tsp active dry yeast
- 3 Tbsp butter, softened
- 1 1/4 tsp salt
- 2 Tbsp sugar
- 1 large egg
- 2 1/2 cups all-purpose flour
- 2 cups whole wheat flour
- 1 Tbsp canola oil
- Cornmeal for pans
- Place the warm milk in the bowl of your stand mixer and sprinkle the yeast on top.
- Let it sit for 10 minutes and then add the butter, salt, sugar, egg, and flour.
- Using the paddle attachment, mix on low until the flour is incorporated and then switch to medium and mix for 5 minutes. The dough will be very soft and a bit sticky.
- Place the tablespoon of oil into a large bowl, swirl around to coat the bottom and sides, and then place the dough in and cover with plastic wrap. Put in a warm spot and allow to rise for about 2 hours, or until doubled in size.
- Sprinkle corn meal onto a griddle pan (and a separate foil-lined baking sheet for the extras). Pull golf ball sized pieces of dough off from the bowl, roll into a ball, and place on a griddle pan, about 2 inches apart. Place those that don't fit on the pan onto the baking sheet.
- Lightly press down on the balls once on the pan, to flatten out a bit, and let rest for about 20 minutes. They will "rise" and expand a bit more in this time.
- After the 20 minutes is up, heat the griddle pan over medium-low heat and cook about 12 minutes per side, until golden brown. Turn burner or grill to medium low and cook until golden brown, ~12 minutes on each side. If they seem to be browning too quickly, reduce the heat.
- Carefully transfer the second batch from the baking sheet to the griddle without deflating, and repeat the cooking process.
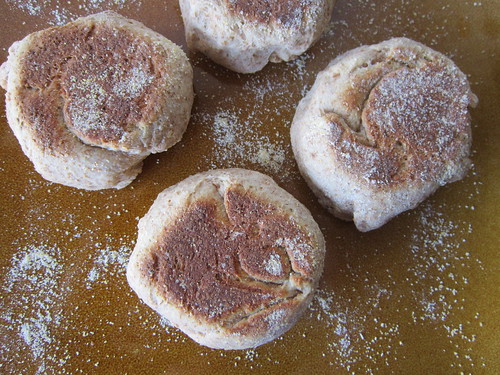
- Allow to cool completely on a rack, then split open with a fork and enjoy with your favorite toppings!
No comments:
Post a Comment
Thanks for the comment!!